ZOOM GUIDE FOR STUDENTS
The Zoom platform has become the new normal when it comes to ‘attending class’.
At Kaplan Business School our learning philosophy focuses on active participation and engagement in class. Collaborating with your lecturer and peers, and debating and questioning content, all helps to enhance learning.
This should be no different in a virtual class!
So, to help you get the most out of your online classroom experience, we’ve pulled together a 101 guide to Zoom for tertiary students.
It includes some tips and advice on how to better prepare for, navigate and participate in, your Zoom lectures:

HOW TO PREPARE
Just like you’d come to class on time with any equipment and resources you might need, it’s important to be prepared ahead of your online lectures.
Zoom’s scheduling function actually ties into iCal and Google Calendar, making it easy for you to keep track of your class schedule.
When joining a Zoom webinar, try log on from a distraction-free, quiet environment with a strong Wi-Fi connection. Close any unneeded applications on your computer to keep the video functioning optimally.
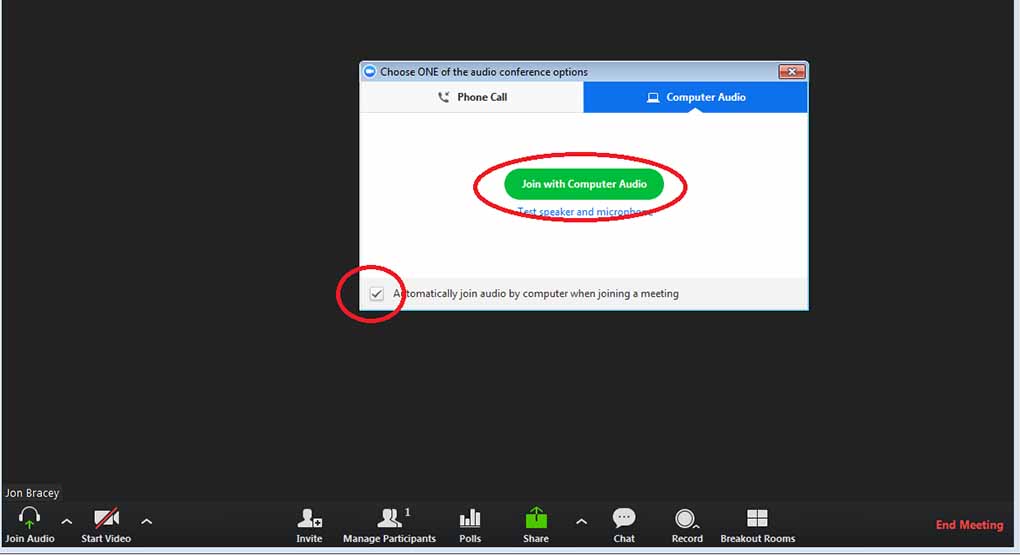
It’s a great idea to join the class 5-10 minutes early to check your video and audio are working correctly. When you log onto Zoom, a pop-up box will appear that will allow you test your microphone and speakers:

It’s also worth being mindful of what might be visible on your video. Try positioning yourself so you have a solid wall behind you or turning on the virtual background.
Once in the meeting, you can select a virtual background by clicking the up arrow to the right of the ‘Start video’ icon in the main control panel.
HOW TO JOIN
At Kaplan Business School, lecturers will post a link to each week’s live Zoom webinar as a Subject Announcement.
All students need to do is click on the link at the scheduled time to access the live webinar (you don’t need to set up a Zoom account to activate these links).
Enter the classroom using your first name and surname.
Viewing options
Once you join the webinar you can use ‘Gallery view’ to see everyone or ‘Speaker view’ to focus on your lecturer.
The default mode is ‘Active speaker’ where the large video screen will switch to display whoever is speaking. However, if you want to see more of your class, you can click ‘Gallery view’ in the upper-right corner of your Zoom window. This view will allow you to see up to 49 participants at one time.

Note-taking
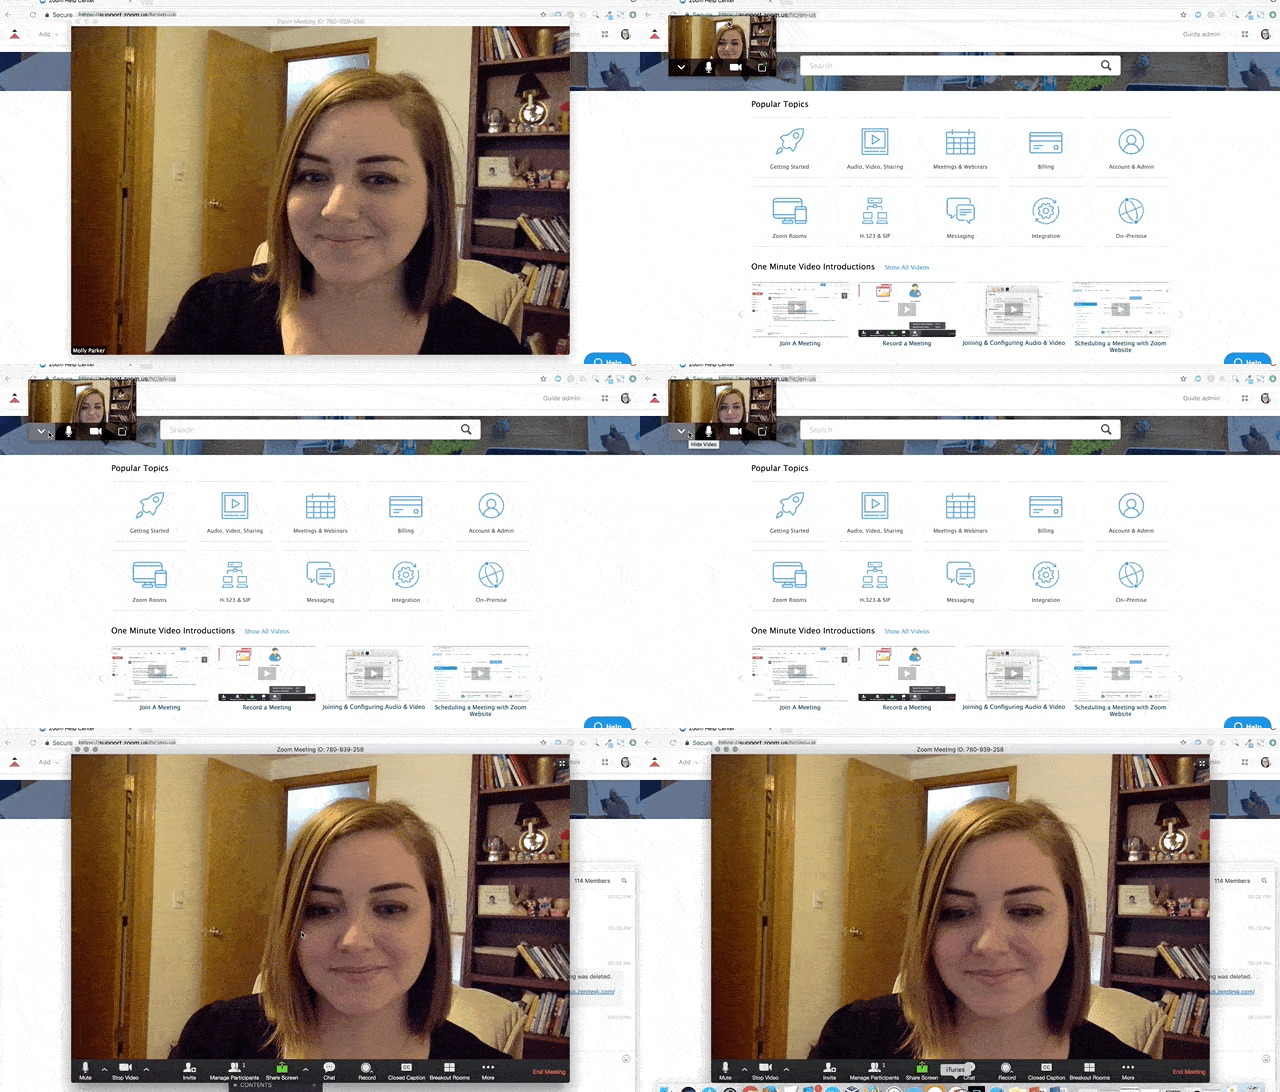
You can also switch to ‘Mini-window view’, by clicking on the minimise icon (top right for Windows, or top left for Mac) – this lets you keep on top of any other note-taking applications that you might need during your lecture. Once in the mode, you can click on the down arrow on the left-hand side to even go as far as to collapse the video.
Learn more tips on how to take notes while using Zoom

Video and sound
For better engagement during the class, try to speak to the camera when video is enabled and not to the screen.
Generally, the sound quality will be clearer if you use headphones. However, if your headphones don’t have a microphone, just use your phone/laptop microphone.
Background noise can be really disrupting to classroom discussions. As part of Zoom etiquette, make sure you’re muted when not speaking.
Use ⌘Cmd+Shift+A (PC: Alt+A) or click the microphone button on your control bar to mute/unmute your audio.
Tip: if you are suddenly called on to speak, avoid scrambling to click the microphone button. You can simply press and hold the spacebar to quickly unmute/mute your mic.
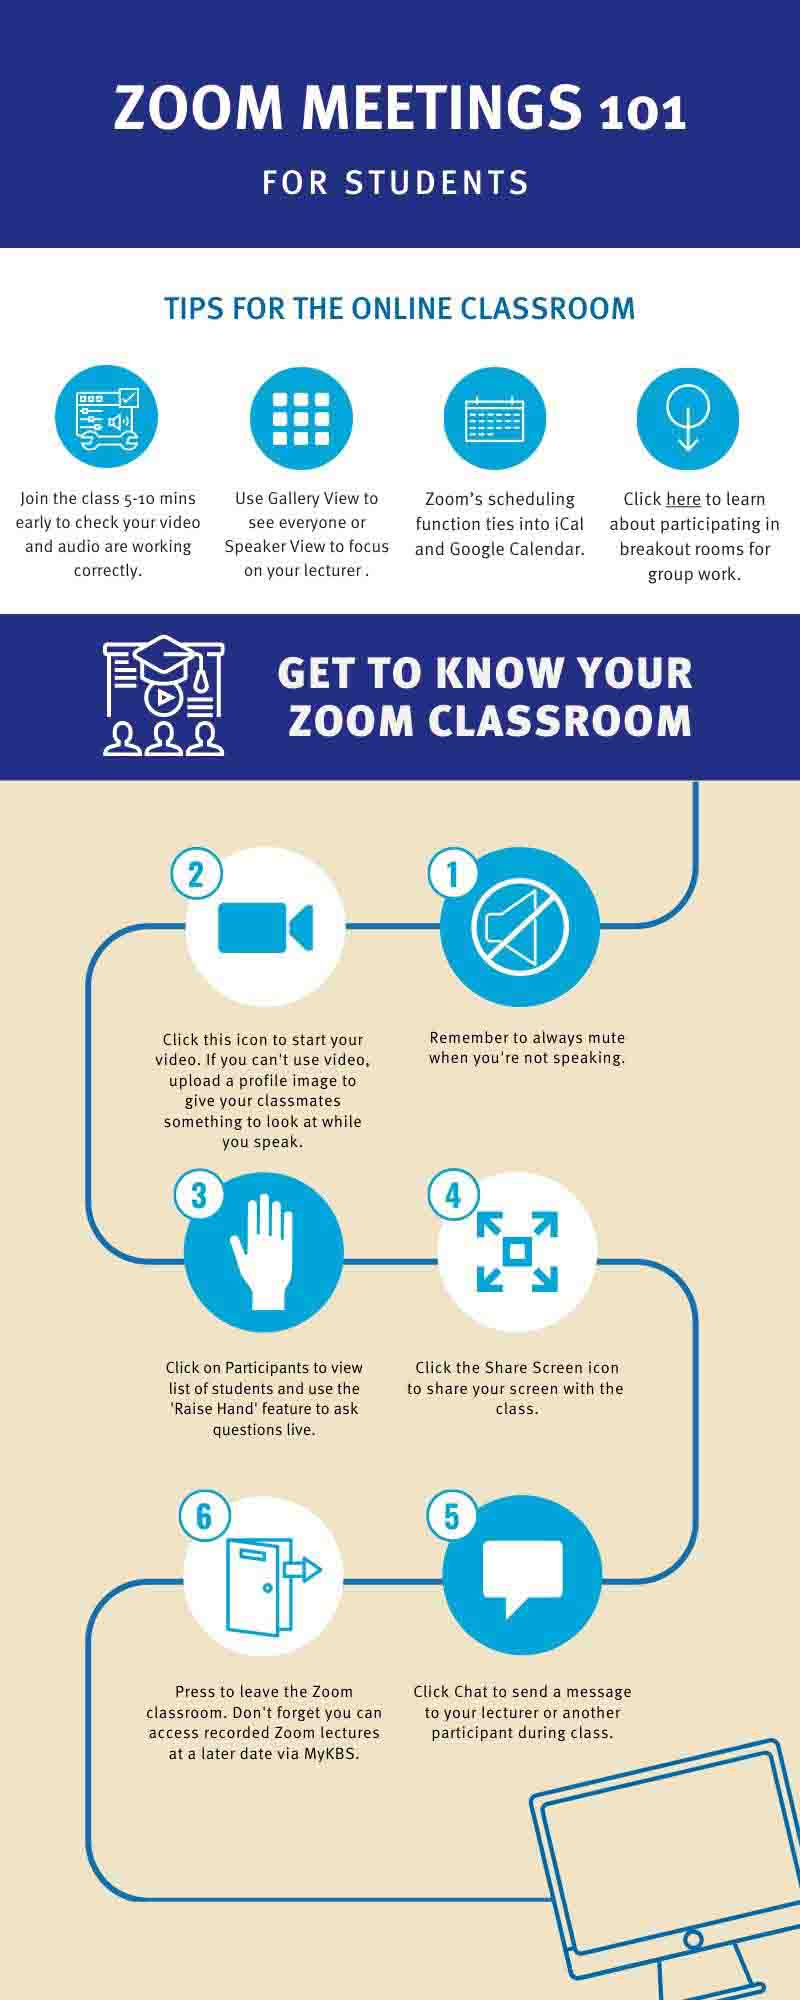
HOW TO NAVIGATE YOUR ZOOM CLASSROOM

HOW TO PARTICIPATE
Engaging with your lecturer and peers as much as possible will make all the difference as to the value you gain from each session.
There are many ways you can participate in a Zoom webinar:
Raise hand
Use the ‘Raise hand’ feature if you want to ask a question during your lecture. You can do this by clicking on the ‘Participants’ icon in the control panel, and then ‘Raise hand’/’Lower hand’. Your lecturer will be able to see this and address you during the live discussion.

If you don’t feel confident enough to speak up or can’t find the right moment, you can also enable other helpful non-verbal cues (you may need to check your settings first). First, click on ‘Participants’. You can now select from a range of icons, such as the ‘Go slower’ button, that can indicate to the lecturer that you need a little more time to take notes or understand a new concept.
Chat
You can submit a comment or question anytime via the ‘Chat’ icon on your control panel. This will open a chatbox on the side of your meeting room screen.
Then, use the drop-down menu under ‘More’ to send a private message to your lecturer, or select ‘Everyone’ to send a message to all webinar participants.
Share screen
The lecturer may ask for you to share your screen with the class.
To do this, click on the green share icon in the middle of your main control panel.
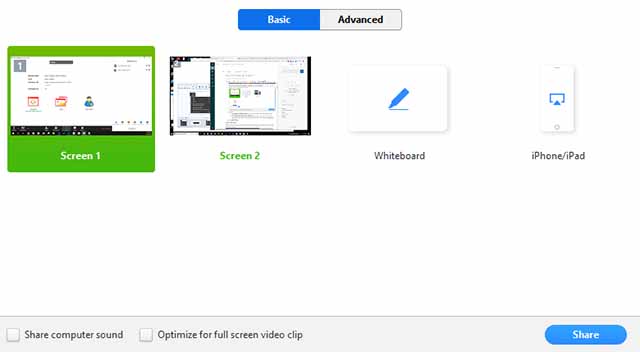
You can then select which part of your screen you would like to share. If you are asked to share a video or audio clip, click on ‘Share computer sound’.

To stop sharing your screen, click ‘Stop share’ at the top of your screen.
Annotate
You can write on the class whiteboard or presentation by clicking on ‘View options’ at the top of the screen and then ‘Annotate’. A new control panel will pop-up. You can undo what you wrote on the screen, by clicking ‘Undo’ or erase by clicking ‘Clear’. To close the annotate feature, click on the ‘X’.

Breakout room
Breakout rooms are sessions that are split off from the main Zoom webinar.
Your lecturer may choose to start a breakout room so that you can discuss topics and collaborate in smaller groups.
Learn More about how to join, participate and leave a breakout room.


